Lisa Angelettie

Bestselling Amazon Author

  • START HERE
  • BOOKS
  • COURSES
  • RESOURCES
  • HIRE LISA
  • BLOG
You are here: Home / Archives for Writing

Ensure Vs. Insure: Can You Interchange The Words?

May 3, 2014 By Lisa Angelettie Leave a Comment

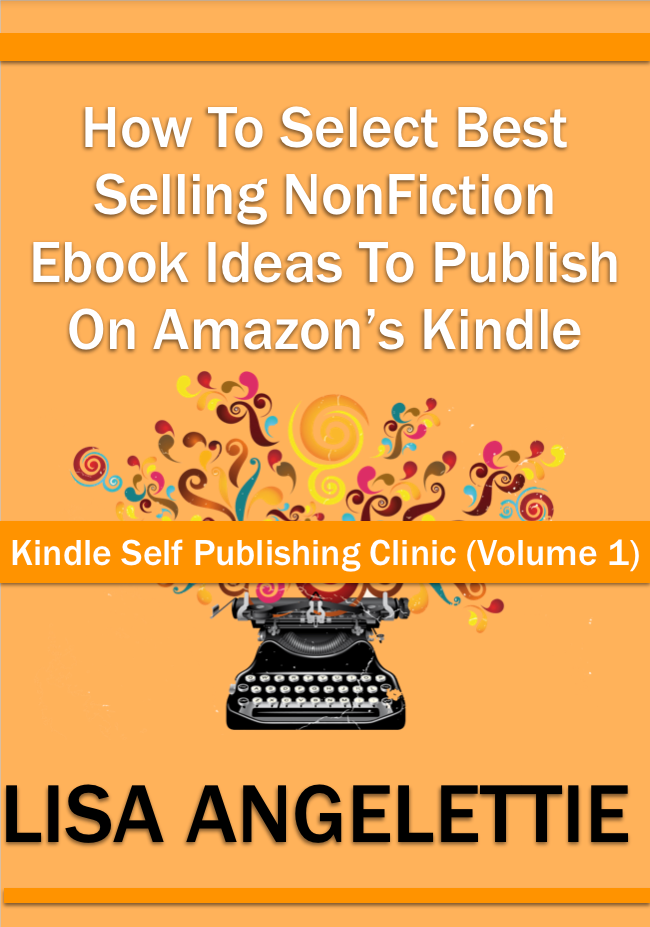
I was working on my edits for my book How To Select Best Selling Non Fiction Ebook Ideas To Publish On Amazon’s Kindle and since my brain was muddled with “edits”, I started to second guess myself about the usage for ensure and insure. When I thought about, I wasn’t sure if I really knew the grammatical rules around the usage of both words.  So I looked it up and was satisfied with this answer over at Writer’s Digest:

Q: Are “ensure” and “insure” interchangeable?—AnonymousA: Some stylebooks say yes, and some say no. Are you any less confused? These two words are often used in place of each other, but WD’s style separates them.WD—and many other publications—uses “insure” only when referring to financial insurance policies. After signing a contract with a professional baseball team, Jack decided to insure his pitching arm for $1 million.

When the meaning is “to make certain,” WD sticks with “ensure.” It’s my job to ensure that you don’t misuse terms like these.

There are some newspapers and magazines, such as The New York Times and The New Yorker, that still use “insure” in both instances, but it’s fairly archaic to do so. Most publications differentiate the two.

I use to edit over on the news desk at The New York Times in Washington D.C., and their usage of the word is probably what tripped me up:)
Filed Under: Writing Tagged With: Grammar Errors, Grammar Tips

Amazon Writing Clinic Series Launches Soon! (Get Promo Copy)

May 1, 2014 By Lisa Angelettie 43 Comments

As many of you know, I have been furiously working on a book series dedicated especially to all of my readers on this blog. It’s called the Amazon Writing Clinic Series and I’ve just completed Volume I of the series titled: How To Select Best Selling NonFiction Ebook Ideas To Publish On Amazon’s Kindle. The book is in final edits and should be up soon on Amazon. I will announce it when it’s live.

amazon writing clinic book

I’ll be deciding on topics and writing the series based on a gang of reader feedback from this blog AND on what makes sense as you embark on your venture as an information author a.k.a. nonfiction writer.

A lot of readers who are considering writing and publishing to Amazon as a secondary income have said to me countless times that they have little idea of how to select niches that are profitable. Obviously one of the big nightmares about this income stream is that you may possibly write a book that no one wants to read.

While there are no guarantees that people will purchase your book, read it and review it, there are definite steps you can take to ensure that you have a really great chance of making money and making a difference with your book.

The first CRUCIAL step is by selecting a topic that is profitable. My formula for success in doing this is by selecting a topic based on this mathematical equation: Knowledge + Passion + Profitability =Amazon Success.

Snag A Promotional Copy Of The Book!

I am releasing several copies of the book as promotional copies to those that are interested in reading it (pretty quickly:) and leaving an honest review on Amazon about it. If you’re interested in receiving a copy, then leave a comment on this post and I will send you a Pdf copy of the book via email.

 **UPDATE** 5/7/14

I am no longer releasing any further promotional copies of this book, but be sure to continue to check back on my site for further promotions. Thank you so much to the readers who participated. If you’d like to purchase the book and start generating ideas for your first (or next) nonfiction book, please click on this link:

How To Select Best Selling Nonfiction Ebook Ideas To Publish On Amazon’s Kindle (Kindle Self Publishing Clinic Series)


Filed Under: ePublishing, Writing Tagged With: Amazon Writing Clinic

Check Out My Fiverr Gigs!

April 24, 2014 By Lisa Angelettie Leave a Comment

fiverr gigs

In an effort to introduce my business to a broader audience, I have created six gigs on the popular outsourcing website Fiverr. People will get the opportunity to try some of my services at rock bottom prices and of course the hope is that they will return to me again for more work and for my more sophisticated services, which are at a higher price point.

Fiverr is also a great place to test out a new service that you may be considering and want to “tweak” before you offer it to your tribe. This is another reason why I am doing this as well.

Right now, I am testing six services that I have done with VIP clients only but am looking for a way to offer them at a more affordable price point for a larger demographic. Here are the services that I’m offering, all at the famous Fiverr $5 price:

1. Transcription of 10 minutes of audio or video

2. Transcription of 12 pages of  notes (handwritten or typed)

3. Tweeting a promotion to all 15,000+ of my Twitter followers

4. Professionally analyze someone’s blog (content + seo)

5. Proofread one blog post in 24 hours

6. Proofread and edit any document up to 1200 words

You can take a look at all of my gigs here: http://www.fiverr.com/writergirl

Buying On Fiverr

If you’ve never purchased a product or service on Fiverr, you won’t believe what your missing! You may think that for $5 bucks you’re going to get junk, but that is not always the case. Typically what you’re paying for is a “taste” of the service the seller provides and you have to pay for more “gigs” to get the full kahuna. I’ve made several purchases from Fiverr over the years and honestly I wasn’t disappointed by much. Just remember that if it sounds too good to be true, it probably is. Select your gigs carefully.

Filed Under: Working At Home, Writing Tagged With: Fiverr, outsourcing

How To Convert & Share Your HTML Articles Via PDF Format

December 6, 2013 By Lisa Angelettie Leave a Comment

If you’re a writer, chances are that at some point you will need to share your articles with someone. Of course in the old days when I worked in print media, I would get a copy of my clips and I would lovingly place them in plastic folders in a portfolio book. Now things are different and most people will want to view your clips online via their computer, tablet, or phone. So the best way to share your writing samples with folks is to convert your html articles into PDF versions.

If it’s just a matter of sharing content that you’ve written, chances are that you already own a software program such as Microsoft Word or Pages and can CONVERT or SHARE your documents into PDF versions. But if you need to show proof that you’ve published your clip somewhere then you’ll need to share that article from the actual site with others. The obvious way to do this would be to share the live link to your article (ex. http://lisaangelettieblog.com/17-mindset-shifts-that-will-transform-your-business/), but some people will want to actually have a clip that they can read offline (on a Kindle or iPad for example) or print out (ex. 17 mindset shifts) That’s where a PDF comes in handy.

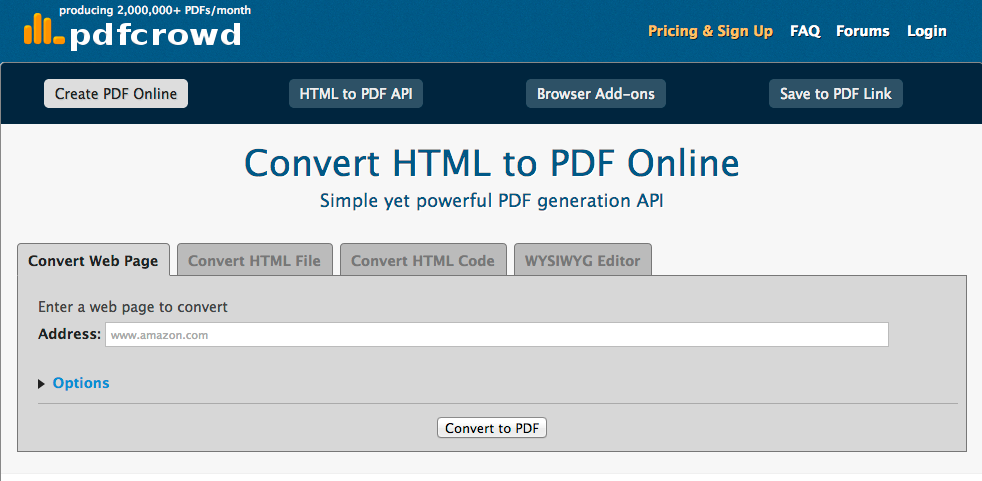
To convert my guest posts to PDFs, I like to use PDFcrowd.com. With this free tool you can convert your clips into PDF files various ways: directly on their website via web link or using their Firefox or Chrome browser extension. I use the Chrome browser extension which makes converting any web page to a PDF file easy as pie, and I highly recommend it.

pdfcrowd

1. To use the Firefox or Chrome extension, simply go the the browser add-ons or extensions marketplace for your browser.

For Chrome it’s: https://chrome.google.com/webstore/category/extensions
For Firefox it’s: https://addons.mozilla.org/en-US/firefox/?application=firefox

2. Search for PDFcrowd, then download (it’s free!).

3. You’ll see the icon for PDFcrowd next to your other add-ons or extensions.

4. Next you’ll go to the web page of the article you’d like to convert.

5. Once there you’ll click on the PDFcrowd icon in your browser and let the magic happen!

6. You’ll see a new PDF file in your downloads folder. The title will be the url address of the article.

7. Feel free to rename your document to a more user friendly title, just make sure to keep the .pdf suffix intact

If you choose to use their online tool, it’s pretty self explanatory. Just copy and paste the url of the article you want to convert, paste it into the box, and click on the “convert to pdf” button.  Your document should download to your download folder.

Notes: This tool converts the ENTIRE page to a pdf file. This means that if you have an article on a blog and there are a 100 comments, your PDF file is going to be pretty long because it converts the entire page including comments. A way you may be able to work around this is to see if the site offers a “printer friendly” version of the article and then convert your document from that version.

Tip: Consider offering your readers extra value by offering PDF versions of your articles. PDFCrowd also offers the code for adding a link to your website which enables readers to save your articles to their computer as a PDF. Some people do this for every article, but I like to do this for select articles.


Filed Under: Writing, Writing Articles

How To Write A Book Review

November 25, 2013 By Lisa Angelettie Leave a Comment

book reviewWhen I worked on the editorial desk for The New York Times (Washington Bureau), I was living in Washington D.C. at the time and the cost of living was pretty high. I needed another gig and was blessed with the opportunity to freelance as a book reviewer for Publisher’s Weekly. I didn’t realize it back then because I was too young and dumb, but every time I sat down to write a review for a book, I had an author’s livelihood in my hands. I was just one person who was going to write a review for an author’s book in a publication that lots of people paid attention to and respected. And let’s not forget that I was getting paid to do this. Now that I look back on it, it was too much power for one person to wield.

Now that I’m older and the landscape of the publishing industry has dramatically changed,  the “readers” are the ones who collectively wield the power. Sure we may all still read reviews in Publisher’s Weekly or The New York Times, but what really helps us make a decision about a book are the book reviews written by “real people” that you find on places like Amazon and Goodreads. That’s where a book review really matters.

I started writing book reviews online sheerly as a gut reaction to finishing a book that I either loved or hated. What I didn’t really anticipate was the fact that authors would start approaching me and asking me to review their books. I’m not even an Amazon top reviewer or someone in Amazon Vine, but I get approached by authors pretty often. As an author myself, I depend on book reviews, good and bad to tell me if I’m getting it right or if I missed the mark. So I believe it’s good “book karma” for me to write a book review, when I’ve read an especially good book. I just always want to make sure that it’s useful for the reader…

How To Write A Book Review That Is Genuine And That Readers Find Useful

1. I typically write my book reviews on Amazon and Goodreads, because I think they are the 2 most relevant spaces for book reviews.

2. I DON’T write book synopses in my book reviews. I find it irritating when a reviewer feels the need to retell the entire plot, and it obviously spoils it for people who are actually reading the review to determine if they want to read the book.

3. I don’t write reviews that contain SPOILER ALERTS. You actually see this a lot on Amazon. In my opinion, if you were so moved by some part of the plot then go talk about in an online forum, Facebook group, etc. Just adding the words “spoiler alerts” to your review is not going to make up for the fact that you have probably just ruined the element of surprise or suspense for someone who has not yet read the book.

4. When writing a positive review, I make sure to include the “why” I liked the book. The reasons why you may have liked a particular book may resonate with someone else who’s on the fence about the book.

5. The ideal length for a book review is between 75-500 words. No one wants to read just a two word “Great Book!” review and no one wants to read a long dissertation either.

6. Because I am an author, I typically do not write bad book reviews. If I didn’t like the book, I don’t write anything at all about it, because I’m not going to make a lot of author friends that way:) and plus I think it’s bad book karma. BUT having said that, I do think it’s important to be genuine when writing a review. If there is something that you didn’t like about a book, then write “WHY” you didn’t like it. Be specific. Be honest. And remember that this is someone’s “baby” so write your words carefully.

7. If you are given a free book to review, it’s essential that you fully disclose the fact that you “received a free book in exchange for an honest review”.

8. The easiest way to write a book review in record time is to write the review in the same way you speak. This means in a conversational tone. Pretend you are talking about the book with a friend, what would you say to convince them to read or not bother reading the book?

What now? Get some practice in by going to Amazon or Goodreads and writing a book review on the last book you read.

Filed Under: Writing Tagged With: Amazon, Book Reviews, Goodreads

Get More Writing Done With The Write Or Die Productivity Application

October 23, 2013 By Lisa Angelettie 4 Comments

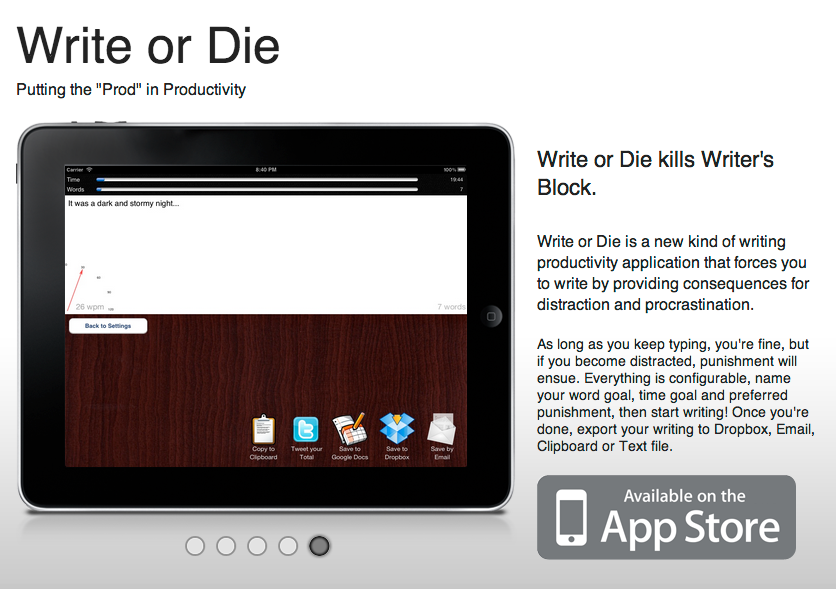
write or die application

I am gearing up for this year’s National Novel Writing Month (which is every November) and I wanted to put a few things in place to help keep me focused. The goal of the month is to write a 50,000 word book in 30 days, which basically amounts to 1667 words a day. It’s definitely challenging for writers of all levels, but it’s a lot of fun and there are a lot of ways that other writers will support you during the process. All for free of course:) While I will be in fact working on a novel, please note that you can also use this challenge to write your non-fiction book as well. In fact I encourage you to do so.

One of the problems that many writers face is becoming distracted and/or editing their work as soon as they type it (a big no-no). I am definitely guilty of both of these blunders. Checking emails is one of my deadly sins. For others it’s social media. For others it may be distractions in the home, etc. Whatever it is, a few successful writers I know of have recommended a web application called Write or Die for getting them laser focused when it’s time to write. This is how writers have been using this particular app with success, and I’ve decided to try it as well during my NaNo challenge.

1. The first thing you need to do is to decide on a chunk of time in your day when you’re going to write.

2. Then you need to commit to it.

3. Once you’ve committed to it, then you need to start writing.

4. Using Write or Die will keep you on task with the “start writing” part because the application punishes you if you STOP writing for a certain period of time. That’s right…punish you.

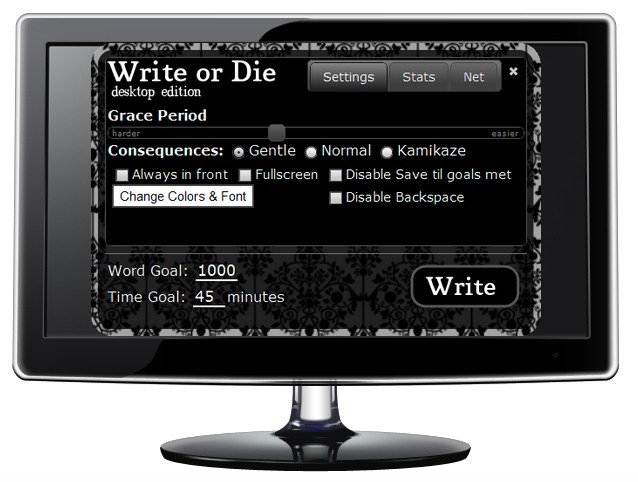
With this application you can set a word goal, a time limit, and then start writing. If you stop writing after a certain period of time the app will punish you based on the “mode” you’ve set the app for. Gentle mode shows you a pop up window that lets you know you need to get writing again, normal mode plays an “evil” sound as a warning, and the kamikaze mode starts erasing what you’ve already written if you don’t get started writing again! Crazy huh? Crazy like a fox:)

You can download the app for your iPad in iTunes or you can download the desktop version (which works with PC, Mac, and Linux). Either version is only $10 bucks, which I think is a great deal.

Write or Die Desktop Version

Keep in mind that this is not a sophisticated writing and editing tool like Scrivener. The point of this tool is to get words written. 1st draft only. The whole point is that you don’t edit yourself like you usually do which may be hindering your production. The whole idea is to FIRST get a daily dose of word production. When your finished your goal for the day, you can then copy and paste that into your Scrivener or Microsoft Word document and edit later.

Sounds fun right? If you’ve downloaded the app and are using it or have used it in the past, let me know your thoughts in the comment section. I’ll post an update on my usage of it after NaNo.

Sound a little too hard core for you? This is a different (bare bones) app that has a much softer touch for you chickens:) http://writtenkitten.net/


Filed Under: Writing, Writing Productivity Tagged With: Scrivener, Write or Die, Writing Productivity

Writing Resources For The Disabled Writer

October 13, 2013 By Lisa Angelettie 2 Comments

disabled writer resourcesI take for granted that I can wake up, sit in my office chair, and write/type all day long if I want. No restrictions. Nothing is hindering me. I’m physically capable of doing it, but there are many people who have a physical disability that restricts their ability to write with ease on a daily basis. For example, I have a friend who has multiple sclerosis and no matter how many times she tells me, it doesn’t totally seem to register to me that some days she just can’t get a lot of writing done in her business because sitting at a computer for long periods of time is just too physically painful.

Yet writing is the ultimate freedom for someone who may be restricted in some way physically, and so as a writer, I am very much committed to promoting the career of writing as a viable income source for people who are unable to work traditional jobs outside the home on a regular basis due to their disability. I hope that this list of resources that I’m sharing today will help support those that choose to do so.

*Please note that this list was originally compiled by novelist Lynn Viehl of PaperBack Writer. She is a self-described “handicapped writer”. You can support her by purchasing one of her books. Thank you Lynn.

Resources

Click-N-Type Virtual Keyboard

CNT keyboard customizer (to customize Click-N-Type keyboard)

Cyber Buddy text-to-speech freeware

Dot-to-Dot MacIntosh Braille Editor

EZMagnifier screen magnifier freeware

Java Accessibility Helper (aids developers in making their JFC-based programs accessible to users with disabilities.)

MouseCam screen magnifier

Natural Reader text-to-speech freeware

Philing.net’s free braille and deaf language fonts

Point-N-Click virtual mouse (designed to be compatible with Click-N-Type keyboard)

Rapid Keys Intelligent Virtual Keyboard

Additional Resources:

Grants for Disabled Writers

Helpful Products for Blind and Physically Handicapped People

Simtel’s list of 114 programs for the handicapped user

Programs for handicapped users

Do have any other resources that may be useful for a physically disabled writer? Please share them below and I’ll add them to the list.

Filed Under: Working At Home, Writing Tagged With: Disabled writers, Handicapped writers

Writing Software

October 10, 2013 By Lisa Angelettie 3 Comments

WRITING SOFTWARE TO WRITE YOUR BOOK IN…

A few years ago you could have asked me about writing software and I would have given you a funny look. “Who needs writing software? Just use Microsoft Word and keep it moving.” Is probably what I would have said. But I have evolved. I have grown. And so for the sake of better organization which leads to faster production (something any writer paying the bills desperately needs), I bit the bullet and finally decided to try writing inside a software program. I use it for ALL of my writing (blogging, reports, articles), not just book writing, because a good program can literally turn writing chaos into bliss.

Fast forward to the present and I am so very glad that I started using writing software. While I only use one particular software program, I have compiled a list of all the writing software programs that I know of for you to try for yourself. I have them listed for both Windows and Mac operating systems, and some are free while others are paid. I have noted which are totally free to use (freeware) and which are paid tools ($). Keep in mind that most paid tools have a lengthy free trial. I have placed a ** next to the program that I am currently using in my business.

WRITING SOFTWARE FOR WINDOWS

1. Scrivener For Windows $

scrivener writing software

Scrivener is a premium software program that you can download for free to try (I think it lasts about 30 days). I highly recommend that you take advantage of the free download from the developer Literature and Latte because you can use the time to learn the program. Scrivener was designed to make first drafts easier and is used by novelists, short story writers, script writers, journalists, academics and other writers who need to organize long writing projects.

I downloaded this software (Mac version) about two years ago and ending up putting it to the side, but found myself going back to it when I was working on a rather difficult writing project. I had too many research notes and quotes and other stuff saved to word processing documents, in my phone, on pads of paper. I needed to organize everything and so AMAZINGLY enough I still had a couple of free days on my original download and I took those days to learn the program and haven’t looked back since. A big bonus of this software for authors is that after you’ve written your book, it will compile and format your book properly for paperbacks (ex. CreateSpace), ebooks (ex. Kindle/iBooks), or as a manuscript.

2. PageFour $

Page Four software

PageFour permits you to edit and organize your writing in a tabbed interface. It provides word processing and outlining capabilities and also provides versioning (called “Snapshots”). A favorite of many writers.

3. SmartEdit $

Smart Edit Software

SmartEdit focusses on the editing phase of a writing project and is created by the developer of PageFour (above). It’s not a replacement for a human editor (like myself:), but it will help make your manuscript editor friendly. It contains tools to help you find repeatedly used phrases, adverb over-use and other common problems.

4. RoughDraft (Freeware)

RoughDraft allows you to create and edit rich text files in a tabbed interface, organize them in a Windows Explorer-like side panel, and to keep notes on each one. Unlike other writing software mentioned here, RoughDraft doesn’t keep your files inside its own package, but instead just aids you in organizing them on your hard drive. The only issue with this software is that the developer is no longer updating it. He doesn’t have time, he’s a writer:)

5. WriteWay Pro $

Write Way Software

WriteWay Pro is a designed to be a professional writer’s tool. It limits you to using Acts, Chapters and Scenes, but other than that it is fairly freeform, with a “scratch pad” for storing ideas or scenes you don’t know what to do with. It has decent word processing capabilities, but for me it’s a little over-complicated and clunky, with the option to fill in numerous forms about characters, what should happen in chapters and so forth. I prefer my software not to prompt me, but to leave me to get on with things. Nonetheless, WriteWay Pro seems powerful and relatively flexible, and it is fairly popular.The developers of Liquid Story Binder seem to have had a similar idea to me: to allow writers to store and view their research in the same application as they do their writing. It lets you view pictures and multiple files, although it does force you to do so in different windows. It also features a decent labelling system and various other tools aimed at the creative writer

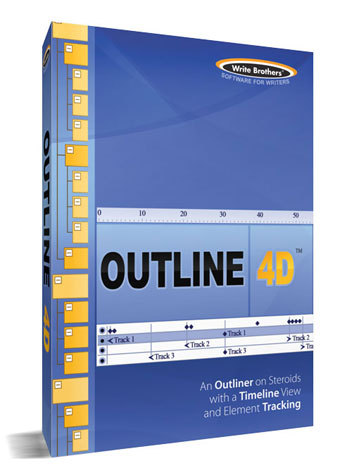
outline 4d writing software6. Outline 4D

Outline 4D (was StoryView) is essentially an outliner, except that as well as being able to view your story synopsis in a traditional(ish) outliner, you can also view it as a hiearchical storyboard. So at the top, you have a very wide box that may be a description of your book as a whole; underneath that, you might have three boxes describing the three main sections of the book; beneath each of those, you might have several boxes describing the chapters in each part; and so on.

7. yWriter (freeware)

yWriter is a free application which helps writers organize their work into chapters and scenes. It is a freeform tool which doesn’t impose plot ideas or perform other creative tasks. Rather, it helps the author keep track of characters, locations, point-of-view, notes, and so forth, all in one application. yWriter is a multi-platform application, which can run on Linux and Mac OS X as well as Windows, using the Mono platform.

8. NewNovelist $

New Novelist Writing Software

NewNovelist seems to be one of the more popular creative writing software titles available on the PC and has received some pretty good reviews from tech experts. It is a pretty rigid program though, because it forces you to divide your writing into twelve parts, which are based (through various onscreen prompts) on Christopher Vogler’s twelve-step interpretation of Joseph Campbell’s work on the hero’s journey. So if you want to write anything that doesn’t fit that particular structure, you may want to try a different software.

9. Writemonkey $

Similar to WriteRoom for the Mac, Q10 for Windows, and jDarkroom for multi-platform, Writemonkey presents a bare bones, isolated space for pure writing. It is a plain-text editor, optionally integrating with Markdown or Textile to allow for easily formatted exports. It’s primary purpose is the development of text, rather than the editing of text, promoting the theory of reduced distractions to increase writing quality and speed.

10. Q10 (freeware)

A free, lightweight, full screen plain-text editor for Windows featuring useful tools for writers, such as live text statistics, customizable page count calculation, target goals, autosave, timer alarm for timed writing sessions, a spell checker, inline comments, and more. If you are looking for something like WriteRoom which runs on Windows, Q10 is an good alternative. It will not help you out with planning and organizing long texts, but as a focussed first-draft tool, it’s isolated full-screen implementation is great for blocking out distractions.

11. ConnectedText $

Connected Text Software

Known as the personal wiki system. This research, information manager and creativity tool brings the power of wiki-style connective thought to your computer. While it’s not a dedicated writing program, it has interesting, unique features that could easily be used in conjunction with a more robust software, as a research assistant—or even as a stand-alone writing application.


WRITING SOFTWARE FOR MAC OS X

12. Scrivener For Mac $ **

scrivener writing software

(See Windows version description above) – This is the writing software program that I currently use and I absolutely love it. Totally worth every penny. I may do a tutorial soon around it because there is somewhat of a learning curve if you’ve never used writing software before– although the developer provides tons of documentation (pdf and video).

13. WriteRoom $

Write Room Software

WriteRoom is a dedicated full screen writing application for distraction-free writing. Imagine a better-looking TextEdit that can operate in a beautiful full screen mode. WriteRoom has deservedly caused quite a buzz among the Mac writing community for its simplicity, style and ability to help you concentrate on the text. In all fairness though, you can really accomplish the same thing if you own Pages.

14. Ulysses $

ulysses app

Ulysses, by Blue-Tec, was one of the first programs on the Mac to be targeted specifically at creative writers. It may have been the first program to offer a full-screen view for text-editing. While they are in the midst of updating their software, I believe it still only allows plain text editing and makes you use tags to define where you want italics to go. The designers have a very strong design philosophy—so this is a writing program that you are either going to love or hate.

15. CopyWrite $

copywrite software

CopyWrite was once the most popular creative writing software available for the Mac, although I’m not sure how often it is updated today. Their last award seems to have been given in 2004 which they still feature on their website. Features include: Simple, consistent editor, Handy notes drawer, Full-screen editor, Version control, Automatic project backup, and Easy project export.

16. Jer`s Novel Writer (Freeware)

I’ve labeled this as freeware, because there is a fully functional version of this software that you can download as a free trial for as long as you like. But the developer basically uses an honor system and asks you to purchase a license key if you choose to keep it. This software is another popular and unique Mac writing program. It allows you to annotate your text using margin notes (which could possibly be why Apple decided to handle comments in Pages), and provides an outline of “text blocks” in a drawer, with which you can move around chunks of text. It also lets you keep notes on your whole text and provides a basic database for storing ideas, character information and research.

17. StoryMill $

StoryMill Writing Software

StoryMill (originally Avenir) is a piece of writing management software written by the same developer, Todd Ransom, who developed Montage, the new Mac screenwriting software, for Mariner Software. There are a lot of similarities between the two. StoryMill provides scene, chapter and character management capabilities along with the ability to annotate your text.

18. DevonThink $

DevonThink Software

Not so much writing software as a great database tool for your research, DevonThink is a very powerful organizational tool and does provide basic text-editing capabilities.

19. OmniOutliner $

Omni Outliner Software

I require all of my clients to become proficient when it comes to preparing an outline and OmniOutliner is probably the most powerful—and popular—outlining tool available for the Mac. The basic version came free with new Macs, until Apple abandoned their bundled software program. Remember when we use to get all kinds of cool free software with our new Macs?

20. WriteItNow (Mac and PC) $write it now writing software

WriteItNow was originally designed for the PC, so the interface isn’t quite as sexy as other Mac software because it isn’t written in Cocoa. However, it provides hierarchical organization of your work and some powerful research tools.

21. MacJournal $

MacJournal Software

MacJournal is journaling/blogging software rather than creative writing software, although you could bend it to creative writing if you really wanted to. It is very powerful, very easy to use, and has won numerous awards.


Source – http://www.literatureandlatte.com/


Filed Under: Tech, Writing Tagged With: Organized Writing, Writing Software

  • « Previous Page
  • 1
  • 2
  • 3
  • Next Page »

Search Me!

READ ON KINDLE

MY FAV’ WRITING TOOL

Scrivener

PERSONAL CONSULTING

FREE WORDPRESS PLUGIN

IMPORTANT LINKS

Subscribe To This Blog On Kindle
Wordpress Guest Post Plugin
Testimonials
Newsletter
Terms of Use
Copyright
Privacy
Disclaimer
Contact Me

From The Blog

  • Back Matter 101: How To Add Killer Call To Actions To Your Books
  • Shelfari Is No Longer An Option In Author Central
  • What Are The Most Well-Read Cities In America?
  • Google Play Is Closed To New Publishers
  • Kindle Blog Publishing Is Amazon Bestseller!

CONNECT WITH ME

Twitter
Facebook
Google+
LinkedIn

Copyright © Lisa Angelettie · Powered By Hostgator And A Whole Lotta Love:)