Lisa Angelettie

Bestselling Amazon Author

  • START HERE
  • BOOKS
  • COURSES
  • RESOURCES
  • HIRE LISA
  • BLOG
You are here: Home / Archives for eBusiness Tools

Amazon Kindle Fire

September 29, 2011 By Lisa Angelettie Leave a Comment

Amazon Kindle Fire: Might Be The Best Tablet Yet!


Okay I’d never thought I’d say this, but I think Amazon has truly gotten it right with the new Kindle Fire. Now I cannot speak on it for sure because it is in pre-order at the time of this writing, but here are the features about it that has the folks over at Amazon very excited!

There are movies, apps, games, music, reading and more, plus Amazon’s revolutionary, cloud-accelerated web browser:

1. 18 million movies, TV shows, songs, magazines, and books
2. The Amazon Appstore – thousands of popular apps and games (like angry birds!)
3. Ultra-fast web browsing – Amazon Silk4. Free cloud storage for all your Amazon content (I love this feature)
5. Vibrant color touchscreen with extra-wide viewing angle (touchscreen!)
6. Fast, powerful dual-core processor
7. Amazon Prime members enjoy unlimited, instant streaming of over 10,000 popular movies and TV shows (Not tons of popular movies and shows, but I appreciate the effort.)

While I love my iPad, I must admit that this seems like the cost affective alternative that is going to knock the Nook out and other reading tablet devices like it.

You can read, surf the web, and  play games? Hmmmm at the $199 price point, I think most of you will jump on it. Remember you can read my articles on your Kindle too.

What are your thoughts on the new Kindle Fire?

Filed Under: Content Marketing, eBusiness Tools Tagged With: Kindle

Hello Bar Vs. Viper Bar

April 4, 2011 By Lisa Angelettie 12 Comments

Hello Bar Vs. Viper Bar

Several of the big online marketers have been using this cool bar across the top of their websites where you can either add some copy and a link or you can add an optin box for your list. The buzz for some time has been that when executed correctly, the bar has an amazing conversion rate. While there have been various versions of this type of thing online for a few years, which was typically done with code that a 3rd person needed to create for site owners, the great thing about the Hello Bar and the Viper Bar is that you simply copy and paste code into a WordPress plugin and like magic your bar appears, wide width, at the top of your website.

I’ve been testing both bars so I’m not sure which one you are seeing at the time that you are reading this article, but many owners are boasting 150 to 200% conversion rates, so I thought it would be wise if I tested both options. In the meantime, I’m going to tell you a little about each bar and how to install them so you can do a little testing for yourself…

The Hello Bar

Hello Bar List BuildingThis is the first of the two bars to be released and it made a lot of buzz online when it did. I’m kind of a late adopter, because I spend most of my time writing and not working on my site, but after reading a review of the use of The Hello Bar over at DIYThemes, I thought it was worth the effort of trying it out. So here’s the deal:

1. The Hello Bar is free, which is always nice. You need to go their site and sign up for a free account. When you do, they will say that in order to get your copy of the bar, you need a key. In order to get the key, they recommend twittering a request for one. (Once a person signs up they typically receive 5 invitations to invite others with this key.) This is really all done as a very smart viral marketing strategy, because if no one on Twitter sends you a key (which no one sent me one), Hello Bar eventually will send you one via email.

2. So once you receive your key and finalize signing up with Hello Bar, you then are led to a page where you can create a bar. You can play around with the color of your bar, the text font, text color and a few other options. You will at this time include your copy and your link text. After you’ve saved all of this, code will be generated for you to copy and paste within the <body> section of your template.

3. If you rather not be bothered with screwing around with your code, then you can download The Hello Bar WordPress Plugin, and paste the code into the box that the plugin provides. Save and your bar is up.

4. If you own a Thesis WordPress blog, then you don’t have to mess with your code nor download yet another plugin. You can just copy and paste the code you generate into Thesis Settings: stats and tracking box. If you have your Google Analytics code in the box, no worries, you can just copy the code for Hello Bar after that code.

5. I’m pretty sure you could also use Thesis Openhook for adding the code as well — I’d try in the header area.

6. Just a note. I was driving myself crazy with adding this bar because of my cache plugin. If you use a cache plugin and actually want to see the bar up on your site, you will need to temporarily deactivate the cache plugin, add and save your code, take a look at your bar and if you’re happy then you go back and turn your cache plugin back on.

7. There is also an arrow on the bar which you can use to close it which is nice, but of course the company needs to self promote virally, so there is a big ‘ole H on the bar as well which links back to the Hello Bar website. Nice links for them!

8. What’s cool about The Hello Bar is the fact that you can use it to promote a new product, build my list, announce something. Just a one line statement and then a link. Now like most people, I would use the Hello Bar for lead generation and list building – not pre-selling. Tell prospects that they can download a free report, ebook, or audio and add a link to the  optin page for that freebie & it’s only a matter of seconds before you acquire a new member on your list.

The Viper Bar

The creator of the Viper Bar (ViperChill) took the Hello Bar concept and took it a step further. The Viper Bar was specifically created for lead generation. In fact, while you could theoretically use the bar like a Hello Bar (with text and a link), what separates this bar from the Hello Bar is the fact that the optin box to your list will show in the bar. People can add their names and email right in the bar.

Read More About The Viper Bar…


Filed Under: Article Marketing, eBusiness Tools, Reviews, Working At Home Tagged With: List Building

How To Fix Paypal Button In WordPress Thesis

February 23, 2011 By Lisa Angelettie 12 Comments

How To Fix Paypal Button In WordPress Thesis: The Quick Fix!

When I run into little glitches building and running my websites, I like to post the workarounds I find for my readers. This was one that was driving me crazy a few months ago and that a few of my clients have also recently run into (I forgot to warn them:)

So here’s a little weird thing that happens primarily on Thesis WordPress blogs. When you create a PayPal payment button and post the code for the button in your WordPress blog’s html editor and save, you’ve probably noticed that your PayPal button looks ENORMOUS and as a result also — distorted.

After searching the web (thank you Andrew :)), I found that the quick fix for this is simply copying and pasting a little bit of code in your CSS code file:

1. Open your Thesis Custom File Editor.

2. If you open this file directly through your blog’s admin, your custom.css file should open automatically or you can select it from the drop down menu. Select EDIT to edit the file.

3. At the end of the file add the following code:

.custom .format_text input, #commentform input, #commentform textarea { width:auto;
}

fix paypal button4. Save your file and refresh. Check out the page where you pasted your code. Your PayPal button should look a normal size now.

Hope this was just the FIX you need today:)

Filed Under: Article Blogging, eBusiness Tools Tagged With: Paypal, Thesis Wordpress Theme, Wordpress

Wikipedia Articles App

February 17, 2011 By Lisa Angelettie Leave a Comment

Wikipedia Articles App

Wikipedia App

I thought this was cool, so I’m mentioning it here. This app is on sale right now over on iTunes. With it you can mark interesting Wikipedia entries you want to read in the future, search text in the currently open article, and print articles and images using AirPrint.

The app is compatible with iPhone, iPod Touch, iPad, and requires iOS 4.0 or later.

Filed Under: eBusiness Tools Tagged With: Mac Marketing

Google Analytics WordPress Vs. WordPress Stats Plugin

February 1, 2011 By Lisa Angelettie 1 Comment

Google Analytics WordPress Vs. WordPress Stats Plugin

If you are contemplating whether to use the Google Analytics WordPress plugin or the WordPress Stats plugin for keeping an eye on things on your blog, I’ve got the right answer for you today.

Choose Both.

It’s no secret to readers that I love stats. I spend about 5-10 minutes everyday taking a look at my stats. I do this not because I am obsessed with traffic, rather with content. I want to know what content on my blog is working and what content isn’t. What did visitors to my blog come to read and what articles enticed them to stay on my site and read a bit more? When you have that sort of insight – you can do MORE of what works and hopefully see better results in conversion, sales, etc. Yet I use both of these stat programs to do it.

So why do you need both plugins? Well let me explain…

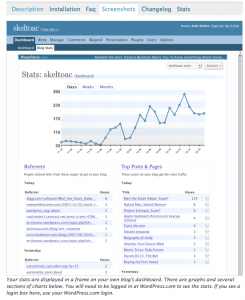
1. WordPress Stats gives you your blog stats in “real time”. Meaning that you can see what your traffic stats are right now. Google Analytics isn’t in real time. Typically when you visit your stats, you can see up to about 24 hours ago – which isn’t bad – but if you published a post and you’re looking to see what kind of feedback you got on it immediately, then you can see that in WordPress.com Stats.

Another think I like is that WordPress Stats also appears in your WordPress admin section, so every time you login to your blog, your stats are front and center – in real time. I love this because without having to log into Google Analytics, etc., I can get a quick glimpse of what my traffic looks like and what keywords people used to find me.

If you are an affiliate marketer, this is also fantastic because this lets you know which posts you should spend a bit more time monetizing. The ones with the most traffic right and the ones that stay and actually read the entire article – not just “bounce” off.

*Update – I forgot to also mention that WordPress Stats does not include visits from your own computer straight out of the box. Google Analytics counts visits from your computer. Now if there is a way to turn that off in G.A. (which there probably is), I haven’t figured it out yet. So just something to keep in mind when looking at your stats with either tool.

2. Now having said that, you must also use another comprehensive stat system to really be able to dig deep into your site and see what works. That’s what Google Analytics does for you for free. I love using Google Analytics because I can see “everything”. I can see who visited my site, how they got there, what browsers they used, if they were on a mobile phone (which is more important than ever now!), what page the exited on, how long they stayed, what keywords they used to find me, what search engine they may have used, etc.

Google Analytics will also let you know what “trends” are going on with your site. What kind of traffic and how much traffic they predict based on past traffic, etc.

*Now just a note here, if you use the Thesis Theme, you do NOT have to download the Google Analytics WordPress plugin. There is a nice little box in your Thesis options where you can paste in your Google Analytics tracking code.

But if you are using a different theme on your WordPress blog, you may not have this option, so it’s easiest to download the plugin which will help you integrate your Google Analytics account with your blog in a few clicks.

So my final word is to use both: Analytics for comprehension and WordPress Stats for immediate gratification. Enjoy!

Filed Under: Article Marketing, eBusiness Tools Tagged With: Google Tools, Wordpress Plugins

Pop Up Domination – Review

January 7, 2011 By Lisa Angelettie 4 Comments

Pop Up Domination – Moved Me To Write This!

You will notice that I do not do too many reviews on this site. That’s because I am so busy trying new things out (I’m a bit of a closet techie geek) that I completely forget to write about them after I’ve implemented them — but I’ve got to admit, this one moved me to write. Anytime you can see a dramatic difference in an aspect of internet marketing, you owe it to the rest of the web to let folks know.

I purchased the Pop-Up Domination WordPress plugin and installed it on my site a couple of weeks ago. I can’t tell you the day because honestly I couldn’t find my receipt – but I saw immediate results. The plugin creates a customizable subscriber pop up light box on your home page or every page ,where visitors to your site can sign up to be a subscriber to your list. You probably saw mine when you visited the site today (if you are a new visitor this week).

This is a look at my stats over on Aweber (my ezine list/autoresponder company) for most of the month of December. After installation, my subscriber sign-ups began to increase per day almost instantly. People even signed up on Christmas!

pop up domination review

So what makes the Pop-Up Domination plugin so great?

1. It’s a WordPress plugin. Installation and activation is easy vs. adding code manually to the proper area on your site’s template.

2. It is customizable. The plugin comes with templates and you can easily customize the colors, text size, etc. You can add your own images (or not) and the opt-in box will still look good.

3. There is an X clearly visible on the opt-inbox for visitors to close  if they aren’t interested. (Many pop-up boxes don’t have this which annoys the heck out of visitors!)

4. It works with most of the top autoresponder companies out there. Just copy and paste their generated code.

5. You can control how often visitors see your box and you can control at what point they see it.

6. It looks good. It really gives your site a polished look.

7. Many of the pros use this plugin. I’m sure one of the leaders in your niche is using it. Don’t let them be the only one who maximizes conversion of new visitor traffic!

8. Bottom line – my subscriber rate doubled! Do I have to say more? Want to try it on your site? I think you should. Worst case scenario, it doesn’t work, then you can simply deactivate it like any other plugin.

Try: PopUp Domination (aff. link)


Filed Under: Article Marketing, eBusiness Tools, Reviews Tagged With: List Building, Wordpress Plugins

MacKeeper

January 5, 2011 By Lisa Angelettie 4 Comments

MacKeeper – My New Favorite Mac App!

MacKeeper ReviewAttention all you Mac geeks, Mac whores, or whatever you like to call yourselves — this is my new favorite Mac application. This award-winning app is fantastic. It’s a way to manage the tasks associated with keeping your Mac clean, reliable, fast, and secure. (Please be advised that I am NOT an affiliate – I’m just lovin’ it:)

I know what you’re thinking — we Mac users don’t have to worry about security! Well there are a few random email phishing bugs that get past our fantastic firewalls – and plus the cleaning up of files that this app does is amazing. I had more than 2600 junk files on my computer which was taking up 1.5 mb of space. All gone and my apps are running faster now. Especially iPhoto. You know how that one can drag!

MacKeeper also schedules backups, data encryption, undelete (which helps recover accidentally deleted files) and has Wise Installer. All this and some kick-butt live premium support. So if you’re looking to clean your Mac up for 2011 – this is the go to application. Hands down.

Don’t worry my PC friends, they also have a version for PC’s called – easily enough – PCKeeper. And no disrespect, but you folks really should look at this and stop using those prehistoric security applications (I won’t name names), but you probably got a free trial for it when you bought your PC. Ugh — too slow!

Did I mention you get a FREE fully functional 15 day trial for either MacKeeper or PCKeeper? So go and clean up my friends, it’s worth it. (They should pay me right:)

Filed Under: eBusiness Tools, Working At Home Tagged With: Mac Marketing

HelloBar Vs. ViperBar (Pt.2)

January 4, 2011 By Lisa Angelettie 1 Comment

HelloBar Vs. ViperBar (Part Two)

So in the first part of our article (Hello Bar vs. Viper Bar), we discussed a bit about why you and I should try a HelloBar or a ViperBar — and the general consensus is for list building & lead generation. I also talked a lot about The Hello Bar, so now we’re going to talk more about The Viper Bar’s, pros and cons, etc.

So think about your lead building ethical bribe. For example, are you giving away a little video training? Then say so in your Viper Bar and ask for their name and email so that they may watch or download your training video (or whatever your freebie goody is) right away.

Viper Bar Plugin

What’s great about the Viper Bar WordPress Plugin is that the website is very user friendly because you learn right on the home page what the benefits are of the plugin and how to install it in about 30 seconds. Okay, with tweaking, maybe a few minutes:)  But very easy…

1. The ViperBar is an actual WordPress Plugin and free. You cannot create code for your bar on their website like Hello Bar; you have to use the plugin. So in order to do that, you can either go the ViperBar website and download it there or you can go to your WordPress dashboard, click on plugins, click on “Add New” and search for the “ViperBar” plugin. When you spot it, then you can upload it to your plugins folder right from within the dashboard.

2. Now that you have the ViperBar plugin uploaded, it’s time to tweak the settings by going to the “Settings” tab in your dashboard, finding ViperBar, and clicking on it to edit the settings. It is here will you tweak the color of your bar, your text, your text font and color, etc.

It is also here where you add the needed information to bridge your new ViperBar to the optin list you’d like to grow or to your RSS feed. ViperBar works with leading autoresponder and list building companies such as Aweber, and all you have to add is the name of your list to make it work together.

3. You can also add type before and after your optin box for an enticing call to action. Much like the Hello Bar, except your swapping out the link for the optin box. Remember to always create an attractive offer in either bar to increase conversion.

4. Speaking of conversion, both The Hello Bar and the ViperBar have  stats available for you to review. For the Hello Bar, you’ll have to login to the site to see your stats for the last day, 7 days, or 30 days. You can also select dates you may want to see conversion results. For the ViperBar, you can see your statistics right in the plugin’s settings area. Just click on “stats”.

So far, I want to say that choosing whether to use the  Hello Bar or the Viper Bar is really a matter of which one you’d prefer. They both were pretty simple installs once I turned off my cache plugin, and so far have they have produced some additional subscribers for me. I look forward to seeing what results you achieve. Let us all know in the comment section below once your up and running.

Read Part 1 Of This HelloBar/ViperBar Review


Filed Under: Article Marketing, eBusiness Tools, Reviews Tagged With: List Building

  • 1
  • 2
  • 3
  • …
  • 7
  • Next Page »

Search Me!

READ ON KINDLE

MY FAV’ WRITING TOOL

Scrivener

PERSONAL CONSULTING

FREE WORDPRESS PLUGIN

IMPORTANT LINKS

Subscribe To This Blog On Kindle
Wordpress Guest Post Plugin
Testimonials
Newsletter
Terms of Use
Copyright
Privacy
Disclaimer
Contact Me

From The Blog

  • Back Matter 101: How To Add Killer Call To Actions To Your Books
  • Shelfari Is No Longer An Option In Author Central
  • What Are The Most Well-Read Cities In America?
  • Google Play Is Closed To New Publishers
  • Kindle Blog Publishing Is Amazon Bestseller!

CONNECT WITH ME

Twitter
Facebook
Google+
LinkedIn

Copyright © Lisa Angelettie · Powered By Hostgator And A Whole Lotta Love:)